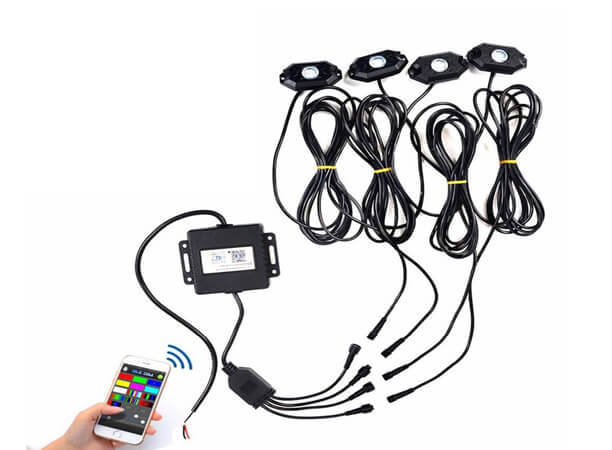
To wire rock lights to a battery, connect the positive wire to the positive battery terminal and the negative wire to the negative terminal. Use a fuse on the positive wire for safety.
Rock lights can enhance your vehicle’s aesthetics and provide extra visibility during off-road adventures. By wiring them directly to your vehicle’s battery, you ensure constant and reliable power supply for illumination. It’s crucial to follow a systematic approach when installing rock lights to avoid electrical mishaps and ensure longevity.
The process involves a few simple but important steps: choosing the correct wire gauge, securing connections, and safeguarding the system with an appropriate fuse. Whether you’re a seasoned DIYer or new to vehicle modifications, wiring rock lights is a straightforward task that can yield impressive results for night-time driving and off-roading.

Credit: jeepspecs.com
Importance Of Rock Lights
Rock lights are an invaluable addition for off-road enthusiasts seeking to extend their adventures into the night. Not only do they enhance visibility on uneven terrain, but they also serve as a pivotal safety feature, illuminating potential hazards that could compromise the vehicle and passenger safety during night drives.
By accentuating the vehicle’s undercarriage, rock lights provide a clear view of the ground below, ensuring better navigation through rocky landscapes. This additional lighting helps drivers avoid damaging their vehicles against unseen obstacles hidden in the darkness.
Furthermore, aside from their functional benefits, rock lights significantly increase the aesthetic appeal of a vehicle. They offer a variety of colors and lighting effects that can be tailored to fit any driver’s style or preference, making one’s vehicle not only safer but also more visually captivating.
Supplies Needed
Wiring rock lights to a battery requires a collection of essential tools and materials to ensure a smooth installation process. Begin by assembling your rock lights kit, which often includes the lights themselves and necessary wiring. You will also need wire cutters and strippers for precise cutting and handling of the wires.
To protect connections and prevent short circuits, it’s crucial to have electrical tape and heat shrink tubing. A soldering iron and solder may be necessary for creating durable, conductive connections. For securing electrical connections without soldering, make use of insulated crimp connectors.
Installation may require drilling; thus, have a drill and drill bits ready. Lastly, to keep wiring neat and organized, use zip ties to bundle and secure wires away from moving parts and high-heat areas.
Steps To Installing Rock Lights
Mounting rock lights effectively requires identifying strategic locations under your vehicle where they can cast the best light and remain protected. Choose spots that are flat and clean to ensure a secure installation. After selecting the ideal locations, firmly attach each light, following the manufacturer’s instructions for mounting hardware or adhesive pads.
Next, it’s crucial to design a thoughtful wiring route that minimizes exposure and avoids hot or moving parts. Carefully plan the path from the battery to each light to protect the wires and ensure a clean look.
For connecting the lights to the battery, identify the positive and negative terminals and use a wiring diagram if necessary. Attach the wires with the right connectors and ensure a solid connection to the battery; this could involve soldering or using crimp connectors.
Before finalizing the setup, test the rock lights to verify that they work as expected. Adjustments might be required to achieve the desired lighting effect or to improve the connections.
Lastly, it is essential to secure the wiring along the chosen route using cable ties or clamps. This step prevents potential damage from debris or motion and keeps the installation tidy and reliable.
Frequently Asked Questions For How To Wire Rock Lights To Battery
Can You Hook Rock Lights To Battery?
Yes, you can directly connect rock lights to a battery, ensuring you follow the manufacturer’s installation guide for safety and functionality.
Do You Need A Relay For Rock Lights?
Yes, using a relay for rock lights is recommended to handle the power load and avoid overloading the vehicle’s electrical system. A relay also allows for safer and more efficient operation.
Do Rock Lights Drain Battery?
Rock lights can drain your battery if left on while the vehicle’s engine is off. It’s best to use them only when the engine is running to prevent battery depletion.
Do You Need A Wiring Harness For Rock Lights?
Yes, a wiring harness is typically needed to install rock lights for a secure and organized connection to your vehicle’s electrical system.
Conclusion
Wiring rock lights directly to your vehicle’s battery amplifies its aesthetic appeal and enhances nighttime visibility. By following the straightforward steps outlined, you can achieve professional results with basic tools. Remember to prioritize safety and consult a professional if in doubt.
Illuminate your ride with confidence and enjoy the custom glow!


