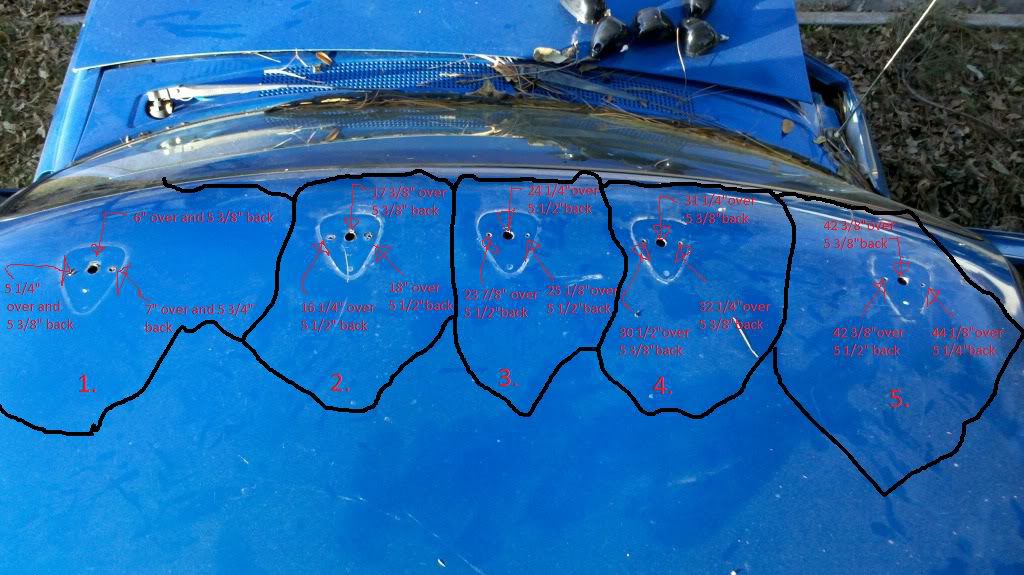
To install cab lights, mark the desired positions first, then drill, seal, and bolt the fixtures. Ensure wiring connects properly to your truck’s electrical system.
Installing cab lights on your truck can elevate its aesthetic appeal and enhance nighttime visibility. The process involves selecting the appropriate light kit, gathering tools, and carefully following the installation instructions. Many truck enthusiasts opt for this modification not only for the functional benefits but also for the customized, rugged look it imparts.
Accurate placement and secure attachment are crucial steps that require attention to detail, as improper installation can lead to leaks or electrical issues. It’s important to consult your vehicle’s manual and possibly seek professional advice to ensure compatibility with your truck’s design and electrical system, making the installation process smoother and safer.
Essential Tools For Installation
Installing cab lights requires precision and the right tools. A screwdriver is indispensable, serving multiple purposes throughout the installation process. It’s crucial for removing interior trims, panels, and securing the lights in place.
Equally important is the use of a drill. This tool is employed for creating pilot holes on the roof of the vehicle, which are necessary for mounting the cab lights accurately. The right drill bits ensure clean and precise holes, preventing damage to the vehicle’s exterior.
The wrench also plays a vital role, mainly when it comes to tightening bolts and nuts. Ensuring that the cab lights are securely attached requires a firm hand and a wrench that matches the size of the installation hardware.

Credit: m.youtube.com
Measuring And Marking
Determining the optimal placement for your cab lights is the first crucial step in the installation process. Ensure you’re abiding by all local laws and manufacturer specifications about the positioning of the lights. After selecting the desired location, measure the distances carefully to achieve a symmetrical look. It’s essential to mark the spots where each light will go with precision to avoid misalignment. Use a ruler or tape measure to find the center point of the truck’s roof and mark it clearly for reference. Then, from the center point, measure equal distances to where each light will sit, marking these spots as well.
For accurate and consistent spacing, consider creating a template out of cardboard or paper. This template will act as a guide for marks and drilling points, thus ensuring each light is correctly aligned. Check and double-check all your measurements before proceeding to the next installation steps. Precision here prevents errors and potential damage to the vehicle. Patience and accuracy at this stage are key to a successful cab light installation.
Wiring And Installation
Removing the headliner is a crucial step which involves gently prying away the interior trim and carefully unfastening the fasteners that secure the headliner to the roof of your vehicle. Taking extra care during this process is essential to prevent any damage to the interior.
To connect the wiring to the fuse box, identify an accessory fuse that powers on with the ignition. Next, using the appropriate connectors, attach the power wire of the cab lights circuit to this fuse, ensuring a secure and reliable connection.
Securing the lights in place requires precise drilling and proper sealing. Mark the positions accurately and drill holes for the mounting screws. Apply sealant around each hole to prevent water ingress. Firmly tighten the screws to ensure the lights are held steadfastly against the truck’s exterior.
Finally, testing and adjusting the lights involves turning on the vehicle’s power and checking each light’s functionality. Aim each light for optimal coverage and tighten the adjustment screws to maintain the desired position. Regularly check the lights to confirm they remain securely fastened and properly aligned.
Frequently Asked Questions Of How To Install Cab Lights
Can I Add Cab Lights To My Truck?
Yes, you can add cab lights to your truck. Check your local vehicle regulations and ensure proper wiring and installation for safety.
Where Do You Wire Cab Lights?
Wire cab lights by connecting them to the vehicle’s electrical system, typically tapping into the wiring harness or fuse block under the dashboard. Always follow the manufacturer’s instructions for safe installation.
Do Trucks Need Cab Lights?
Trucks over a certain size, typically wider than 80 inches, must have cab lights for visibility and safety compliance as per DOT regulations.
What Are The Lights On Top Of A Truck Cab Called?
The lights on top of a truck cab are called clearance lights or marker lights. They indicate the vehicle’s size and presence on the road.
Conclusion
Installing cab lights can enhance both your truck’s functionality and style. With the right tools and attention to detail, this DIY upgrade is certainly within reach. Remember to follow each step precisely, ensuring a watertight seal to prevent future issues.
Embrace the glow; your ride is ready to shine bright on all your travels.


